Robot Network Dashboard Asset Descriptions
Following are descriptions of each of the available Robot Network dashboard assets. You use the assets to create widgets. Note: The default asset names are listed below. When you create your widget, the asset name will be used as a default name. You can change that name.
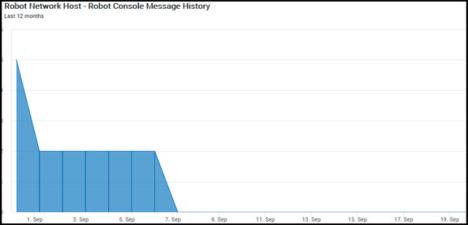
If you have Robot Console installed on the systems you select, you can use this asset to create a widget that displays the number of messages generated on those systems over a period of time. You can choose a single or multiple metrics to view in each widget. See the Robot Console User Guide for detailed information on messages.
Available Assets:
- Robot Console Message History
To Change the Settings:
- Toggle Edit mode On.
- Click Edit Widget.
- On the Edit Widget panel, expand the Advanced Setting section and change settings as desired. See Advanced Settings for more information.
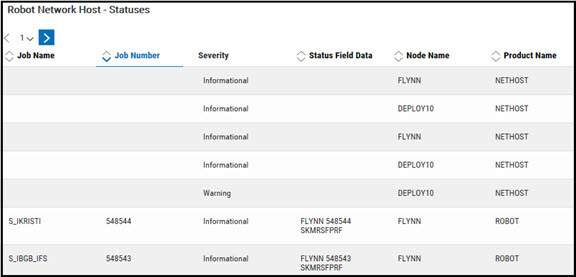
You can use this asset to create a widget that displays the Robot Network statuses for the selected systems. Which statuses you see depend on the choices you make when changing the settings for this widget (see below).
Available Assets:
- Statuses
To Change the Settings:
- Toggle Edit mode On.
- Click Edit Widget.
- On the Edit Widget panel, expand the Advanced Setting section and change settings as desired. See Advanced Settings for more information.
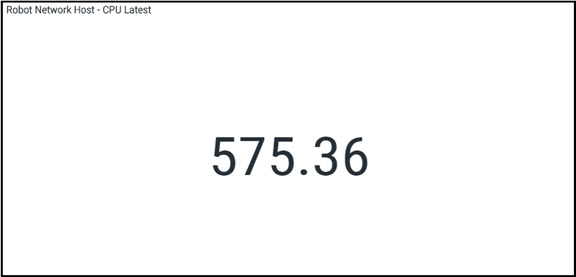
For the selected systems, you use this asset to create a widget that displays current usage of the processor (CPU).
Available Assets:
- CPU Latest
- CPU Detailed
- CPU Summary
To Change the Settings:
- Toggle Edit mode On.
- Click Edit Widget.
- On the Edit Widget panel, expand the Advanced Setting section and change settings as desired. See Advanced Settings for more information.
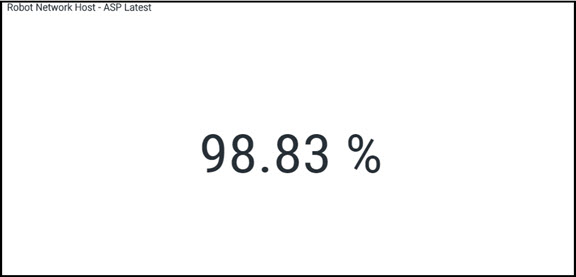
For the selected systems, you use this asset to create a widget that displays current percentage usage of auxiliary storage pool (ASP).
Available Assets:
- ASP Latest
- ASP Detailed
- ASP Summary
To Change the Settings:
- Toggle Edit mode On.
- Click Edit Widget.
- On the Edit Widget panel, expand the Advanced Setting section and change settings as desired. See Advanced Settings for more information.
For the selected systems, you use this asset to create a widget that displays performance metrics.
Available Assets:
- Performance Metric
To Change the Settings:
- Toggle Edit mode On.
- Click Edit Widget.
- On the Edit Widget panel, expand the Advanced Setting section and change settings as desired. See Advanced Settings for more information.
For systems that have Robot Schedule installed, you can use this asset to create a widget that displays information about jobs over a period of time.
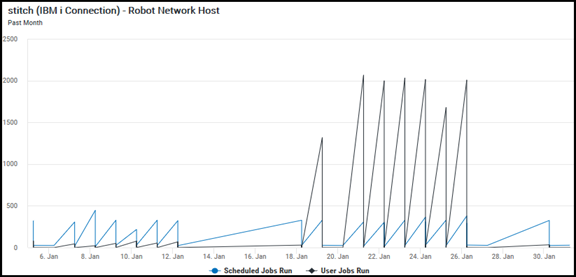
Available Assets:
- Robot Schedule Job History
To Change the Settings:
- Toggle Edit mode On.
- Click Edit Widget.
- On the Edit Widget panel, expand the Advanced Setting section and change settings as desired. See Advanced Settings for more information.
For the selected systems, you use this asset to create a widget that displays disk information, the percentage of time the disk unit is being used during a period of time (Busy) and how fully allocated the disk was during that time (Used).
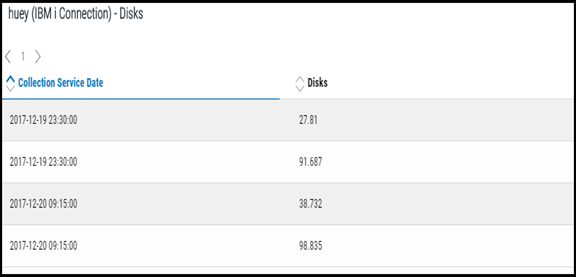
Available Assets:
- Disks
- Disk Busy History
- Disk Used History
To Change the Settings:
- Toggle Edit mode On.
- Click Edit Widget.
- On the Edit Widget panel, expand the Advanced Setting section and change settings as desired. See Advanced Settings for more information.
For systems that have Robot Save installed, you can use this asset to create a widget that displays information about media volumes reported over a period of time.
Available Assets:
- Robot Save Media History
To Change the Settings:
- Toggle Edit mode On.
- Click Edit Widget.
- On the Edit Widget panel, expand the Advanced Setting section and change settings as desired. See Advanced Settings for more information.
For systems that have Robot Reports installed, you can use this asset to create a widget that displays the report history over a period of time and whether any reports are ready to be bundled or deleted.
Available Assets:
- Robot Report Sets History
To Change the Settings:
- Toggle Edit mode On.
- Click Edit Widget.
- On the Edit Widget panel, expand the Advanced Setting section and change settings as desired. See Advanced Settings for more information.
For the selected systems, you use this asset to create a widget that shows the status counts for the Robot products and user applications on a single, selected system, sorted by the highest severity status. The levels from highest to lowest are: Attention, Warning, and Informational.
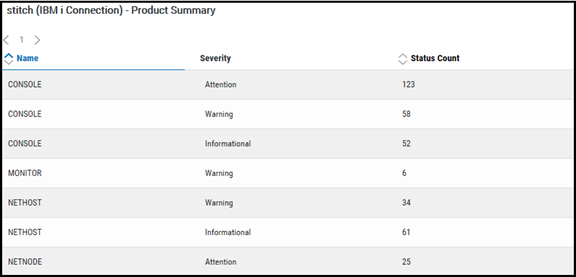
Available Assets:
- Product Summary
To Change the Settings:
- Toggle Edit mode On.
- Click Edit Widget.
- On the Edit Widget panel, expand the Advanced Setting section and change settings as desired. See Advanced Settings for more information.
For the selected systems, you use this asset to create a widget that displays the number of statuses collected by Robot Network for the selected systems over a period of time.
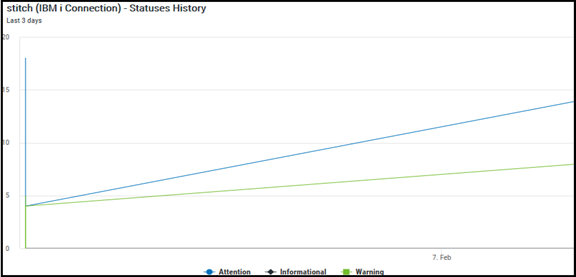
Available Assets:
- Robot Network Statuses History
To Change the Settings:
- Toggle Edit mode On.
- Click Edit Widget.
- On the Edit Widget panel, expand the Advanced Setting section and change settings as desired. See Advanced Settings for more information.
For the selected systems, you use this asset to create a widget that displays the number of resources of different types reporting to Robot Console over a period of time..
Available Assets:
- Robot Console Resource History
To Change the Settings:
- Toggle Edit mode On.
- Click Edit Widget.
- On the Edit Widget panel, expand the Advanced Setting section and change settings as desired. See Advanced Settings for more information.
For the selected systems, you use this asset to create a widget that shows the status counts for the Robot products and user applications on a single, selected system, sorted by the highest severity status. The levels from highest to lowest are: Attention, Warning, and Informational. .
Available Assets:
- Robot Product Summary
To Change the Settings:
- Toggle Edit mode On.
- Click Edit Widget.
- On the Edit Widget panel, expand the Advanced Setting section and change settings as desired. See Advanced Settings for more information.
For the selected systems, you use this asset to create a widget that isplays the number of directory events (added, removed, changed, or threshold) that were monitored over a period of time..
Available Assets:
- System Summary
To Change the Settings:
- Toggle Edit mode On.
- Click Edit Widget.
- On the Edit Widget panel, expand the Advanced Setting section and change settings as desired. See Advanced Settings for more information.
For the selected systems, you use this asset to create a widget that displays the number of non-database faults that occurred over a period of time..
Available Assets:
- Non-DB Fault History
To Change the Settings:
- Toggle Edit mode On.
- Click Edit Widget.
- On the Edit Widget panel, expand the Advanced Setting section and change settings as desired. See Advanced Settings for more information.
For the selected systems, you use this asset to create a widget that displays the average interactive response time for the selected systems.
Available Assets:
- Interactive Response Time
- Interactive Response Time History
To Change the Settings:
- Toggle Edit mode On.
- Click Edit Widget.
- On the Edit Widget panel, expand the Advanced Setting section and change settings as desired. See Advanced Settings for more information.
For the selected systems, you use this asset to create a widget that displays the number of jobs in the system history for the selected systems over a period of time.
Available Assets:
- Jobs
- Job History
To Change the Settings:
- Toggle Edit mode On.
- Click Edit Widget.
- On the Edit Widget panel, expand the Advanced Setting section and change settings as desired. See Advanced Settings for more information.
For the selected systems, you use this asset to create a widget that displays a simple count of the number of jobs currently on each of the selected systems.
Available Assets:
- Jobs Latest
- Jobs Detailed
- Jobs Summary
To Change the Settings:
- Toggle Edit mode On.
- Click Edit Widget.
- On the Edit Widget panel, expand the Advanced Setting section and change settings as desired. See Advanced Settings for more information.
For the selected systems, you use this asset to create a widget that displays the latest disk busy information.
Available Assets:
- Disk Busy Latest
- Disk Busy Detailed
- Disk Busy Summary
To Change the Settings:
- Toggle Edit mode On.
- Click Edit Widget.
- On the Edit Widget panel, expand the Advanced Setting section and change settings as desired. See Advanced Settings for more information.
For the selected systems, you use this asset to create a widget that displays latest information concerning the amount of disk being used.
Available Assets:
- Disk Used Latest
- Disk Used Detailed
- Disk Used Summary
To Change the Settings:
- Toggle Edit mode On.
- Click Edit Widget.
- On the Edit Widget panel, expand the Advanced Setting section and change settings as desired. See Advanced Settings for more information.
For the selected systems, you use this asset to create a widget that displays the latest information concerning interactive response time.
Available Assets:
- Interactive Response Time Detailed
- Interactive Response Time Summary
To Change the Settings:
- Toggle Edit mode On.
- Click Edit Widget.
- On the Edit Widget panel, expand the Advanced Setting section and change settings as desired. See Advanced Settings for more information.
For the selected systems, you use this asset to create a widget that displays the latest information concerning non DB faults.
Available Assets:
- Non DB Fault Detailed
- Non DB Fault Summary
To Change the Settings:
- Toggle Edit mode On.
- Click Edit Widget.
- On the Edit Widget panel, expand the Advanced Setting section and change settings as desired. See Advanced Settings for more information.
For the selected systems, you use this asset to create a widget that displays the latest information concerning DB faults.
Available Assets:
- DB Fault Detailed
- DB Fault Summary
To Change the Settings:
- Toggle Edit mode On.
- Click Edit Widget.
- On the Edit Widget panel, expand the Advanced Setting section and change settings as desired. See Advanced Settings for more information.