Job History
How to get there
To access the Job History page, click Job History under the Automate Schedule menu.
What it does
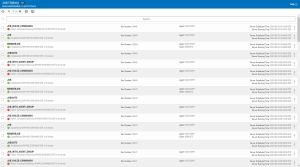
The Job History page displays instant information regarding all jobs that are currently running or completed. Here, you can view the progress of a job, history of when it ran, how long it ran, what agent it ran on, and whether it completed normally or failed. Automate Schedule creates a status record each time a job is submitted and updates this record in the Job History page when the job enters a queue, when it starts running, and when it completes. This page shows the name of the job and the agent from where it ran at the time the history record was created, which is true even if you subsequently change either name. The Job History page also includes actions that enables you to immediately run a job, restart a failed job, or end a running job.
Options
 (Show Actions)
|
Action |
Description |
|---|---|
|
Details |
Allows you to view detailed information about the selected job via the Job History Details page. |
|
Focus History on Job |
Focuses history on a single job. All job history records for the selected job will be displayed on the page. |
|
Job Log |
Allows you to view job log of the selected job via the Job Log page. |
| Job Commands | Shows all available commands of the job. |
| Run Job, Ignore Conditions | Manually runs the selected job. Any attached conditions will be ignored. A confirmation dialog will appear to verify execution. |
|
Restart Job |
Restarts a job that previously ended with a Failed, Canceled, or Error status. One benefit of restarting a job is documentation of handling failed jobs through job history attributes. The restarted job also inherits the scheduling attributes of the original job, such as the scheduled date and time. NOTE: Only jobs that ended with a Failed, Canceled, or Error status can be restarted.
|
|
End Job |
Ends a running or queued job and sets a status code (Completed, Canceled, or Failed). You can only end jobs that are currently submitted (still on an agent job queue) or running. The applied status code determines how reactivity for other jobs or job suites that react to the ending job are processed. For example, if you have other jobs that react to the normal completion or failure of the job, you can end the job with a Canceled status. If you have other jobs that react to normal completion, which you still want to react, you can end the job with a Completed status. To end a job, click |
| Close | Closes the row actions window. |
Sorting and Filtering the Display
There are settings for the Job History page that allow you to choose how to sort and filter the list.
Follow these steps:
-
Click
 Settings.
 -
Select how you want the lists sorted (Sort By). Click your selection again to change the sort order to
 ascending order or
  descending.
 -
Select one or more options under Search By to narrow the list of items displayed.
-
Select an option under Filter By to further narrow the list of items displayed. There are a number of filters to choose from that allow you to filter by time and status.
-
Click
 Settings to close the settings.

