Create a New Query
Creating a new query is fast and easy using the Query Builder Wizard Mode (the default). During the creation process you will be able to:
- Add and Join tables
- Choose, edit and create columns
- Create grouped results
- Filter results
- Sort results
- Create and add parameters
To start press Add Query  .
.
If you use IBM BRMS, and have at least one defined BRMS data connection, you can create a query by starting with a pre-defined BRMS query template.
Query Attributes
The New Query panel opens on the right.

Fill in the options (described below) and press Edit Query  to continue.
Name - Enter a name for the query. Only alphanumeric characters (a-z, A-Z, 0-9)—not including punctuation or symbols—are allowed.
Description - Enter text to describe the query. Any character value is allowed--even spaces.
Select Data Connection - Use the drop-down to select a data connection (location of the data tables) for the query. See Data Connection Management for more on this topic.
WARNING:When changing data connections for existing queries, you can only select connections with the same driver type (MySQL, Oracle, DB/400, and so on).
Multiple data connections can be selected for a single query as long as they are the same connection type and have the same schema.
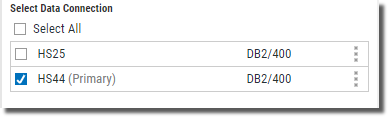
When you select one datasource, all other similar (type and schema) connections will be filtered and presented for selection. Select additional connections to add them to the query. Choosing the ‘Select All’ option is similar to choosing all connections individually, but it will also use any future data connections of the same type.
Override Data Connection Credentials? - Use this option to provide a different user credential for this query. This user will override the credential (user) defined in the selected data connection.
No/Yes: Set the switch to yes to override. This will expose the username and password.
Username: Enter a valid username to run the query.
Password: Enter the password for the specified username.
Although the user can be overridden in the query, this should be used sparingly. In the case where passwords expire you will only have to update the data connection vs. updating many queries that have user overrides.
Tags - Add tags to aid in searching. Tags can be created, added and remove as described in Tags. This is optional.
No: This is the default value. Select this option to ensure results are processed 'fresh' when the query is run.
Yes: Set to turn caching on for the query. The results will be held based on the Permanence setting below:
Permanent - This option is available only if Caching is set to ‘Yes’. Select if you want the caching for the query to be permanent.
No: This is the default value. The length of time the results of the query are cached is based on the Expires setting below.
Yes: The query will always cache its initial results.
Expires: This option is available only if Permanent is set to ‘No’. Use the drop-down to choose one of the following durations to determine how long to retain the initial results: Daily, Weekly, Monthly, Quarterly, or Yearly.
Caching is a mechanism that saves the results of a query for a specific moment in time. It is useful for both for performance reasons and so that the query can freeze a moment in time.
Performance: Consider a scenario where a user creates a query, adds it to a dashboard, and then shares it with the entire company (500 employees) who all open the dashboard at the same time.
If data caching is used, the first time the Query is run the query will execute the SQL statement once, and save the results. Subsequent users will get the cached data, preventing the query from running 500 SQL statements.
Moment in Time: This is an attempt to freeze non-time series data to a specific moment in time. Data often changes over time in the database, but users may want to show the data as it was at the time they authored the query.
For example, a query might show current EOY sales numbers on Dec 31st, 2017. The CEO creates a dashboard over this Query and sends to the whole Company. Over the course of January 2018 additional sales are made, and the data continues to change. If/when a user opens the CEO’s dashboard on January 23rd, 2018, you want them to see the dashboard as the CEO saw it on Dec 31st. To see the same cached data forever, make it Permanent.
Edit Rights - Select using the drop-down list to grant editing rights to users and/or groups.
Users: Choose any of the listed users to allow editing rights to the query.
Groups: Choose any of the listed groups to allow editing rights to the query.
Query Editor Layout
After the initial values (above) are defined and saved the Query Editor displays:

On this screen you can see the following:
- The main design section broken into 'bands' for Tables, Conditions (filters), Filtered Grouped Results, and the Preview.
- Buttons along the top to access: Advanced Mode, Parameters, Download (to CSV), Preview SQL and Help.
- Buttons on the bottom two bands to:
From here you can create your query and:
- Add Tables
- Add and Create Columns
- Add Grouped Results
- Add Record Selection Conditions
- Add Sorting
- Add Parameters
Editor Options
Advanced vs. Wizard Mode
By default the query editor operates in Wizard Mode. This creates logical steps to the creation process (adding tables, joins, columns, sorting, and so on). Switching to Advanced Mode allows you to review and modify the existing SQL.
To access this mode press the Advanced Mode button  at the top of the editor. This button toggles between the two modes. The editor changes to display the SQL.

To switch back press the Wizard Mode button  .
.
Parameters
Press the Parameters button  to create new, or edit existing parameters.
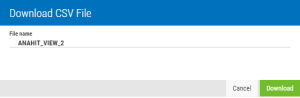
Download (CSV File)
Use this option to create and download query results as a .CSV file.
-
Press the Download button
 .
. A window displays so you can give the file a name.
-
Press the Download button
 and the browser will display the progress.
The file is saved in the Windows Downloads folder.

Preview SQL
Press the Preview SQL button  to quickly review the SQL for the query.

The contents of this display cannot be edited.
Preview Results
While in the query editor you can quickly preview the results of the query. Press the Preview button  to display sample results. Use the down arrow to select the number of sample records to process. The bottom half of the display fills with results.
The data connection used by the query is displayed. If your query uses multiple data connections, you will see them listed (use the arrow to expand) along with their connection status.
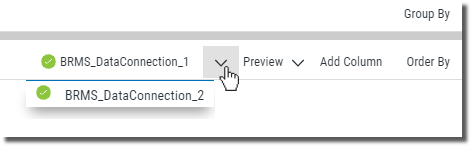
For multi-connection queries, only the first connection is used for preview results.
See Also: