Filter Panel
How to Get There
Open a dashboard, and click Filter.
What it Does
Use this panel to add or edit Dashboard Filters.
Dashboard filters give you the ability to adjust widget filters for entire product instead of having to go into individual widget properties.
Options
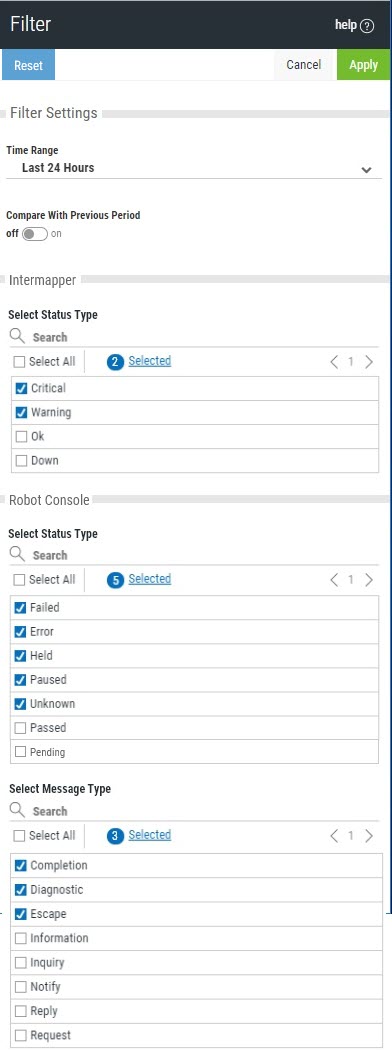
Filter Settings; Time Range
Select a time range to apply a time range filter to the Widgets on the Dashboard.
Filter Settings; Compare With Previous Period
If a widget on your dashboard contains the Compare with Previous Period option, this filter will appear. Toggle this setting On or Off to enable or disable the Compare with Previous Period functionality.
Reset
Click Reset to reset all filters back to their default values. If all filters are already set to their default values, this button will be disabled.
Cancel • Apply
Click Cancel to dismiss the panel without making changes. Click Apply to confirm changes and return to the Dashboard screen.
Product Options
Many product assets contain a widget filter option. You can manage all filters on a global level from the Dashboard Filter Panel instead of going into the Edit Widget Panel for all individual widgets. To do so, make sure filtering is toggled to off within the Edit Widget Panel of your widgets (this is the default). The filter options for all widgets on your dashboard will appear on this Dashboard Filter Panel, separated by product.
Within the Edit Widget Panel, if the filter option is toggled to on, those filter options will not appear on the Dashboard Filter Panel.