Work with Authority Broker Product Settings screen
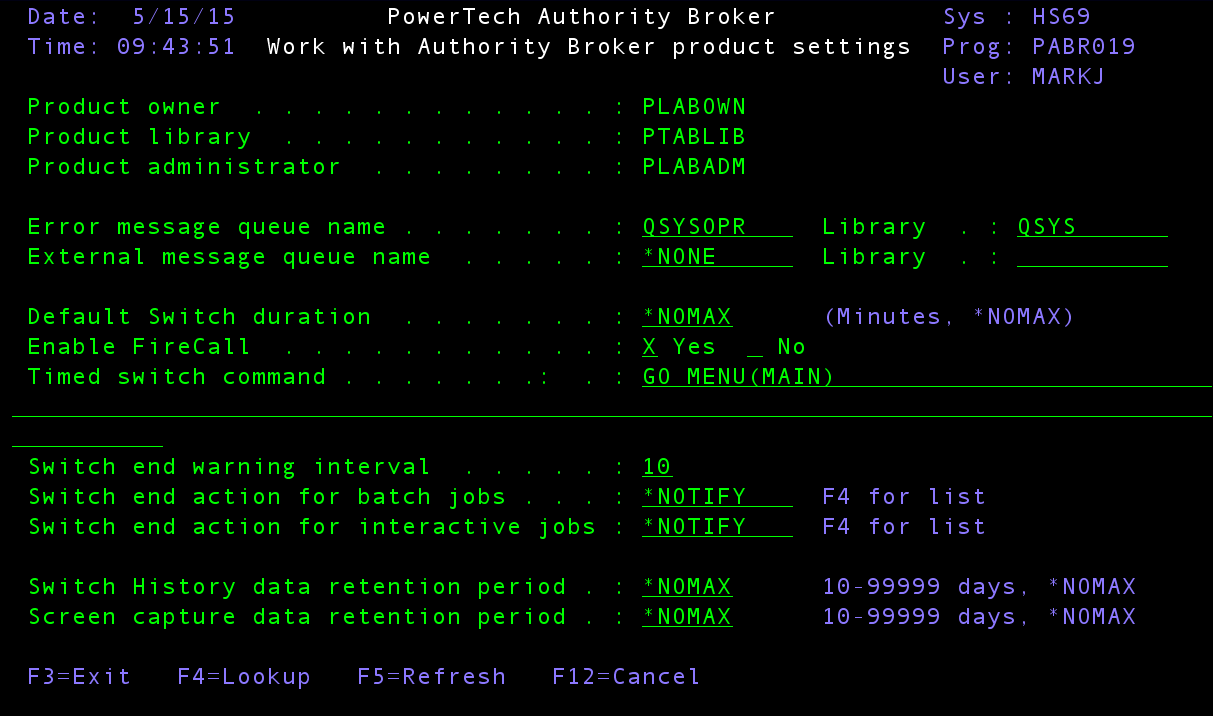
The Work with Product Settings screen allows you to set the initial system values for Authority Broker.
How to Get There
From the Authority Broker Main Menu, select option 5.
From the Authority Broker Configuration Menu, select option 13.
What it Does
Work with Authority Broker Product Settings allows you to maintain product level settings for Authority Broker. Changes to these values take effect immediately. Values for Product owner, Product library, and Product administrator are for informational purposes only and are set at install/upgrade time.
Options
Product Owner
The user profile owns most of the objects comprising the Authority Broker product. The install process will create the PLABOWN profile.
Product Library
The product library is the library that contains all of the Authority Broker objects.
Product Administrator
The name of the user profile whose authority is used to administer the product. This profile (PLABADM) will be granted authority to update Authority Broker files and to run Authority Broker programs. Authorized administrators of Authority Broker will adopt this profile's authority.
All users who you want to be able to administer Authority Broker must be added to the POWERABADM authorization list using the following command:
ADDAUTLE AUTL(POWERABADM) USER(MYUSER) AUT(*USE)
Once authorized to the POWERABADM authorization lists, a user will have all the authorities needed to administer Powertech Authority Broker. Product administrators will dynamically receive *CHANGE authority to Authority Broker data and *USE authority to Authority Broker programs at the time this authority is needed.
Special Information for Authority Broker Reporting
Users without *ALLOBJ Special Authority, who will be allowed to run Authority Broker reports, must be granted the POWERABRPT authorization list.
ADDAUTLE AUTL(POWERABRPT) USER(MYUSER) AUT(*USE)
Note for users who do NOT have *ALLOBJ special authority in their profile:
- If you are only on the POWERABADM authorization list, you can administer the product but not run reports.
- However, if you are on the POWERABADM authorization list and the POWERABRPT authorization list, you can administer the product and run reports.
- If only on the POWERABRPT authorization list, you only have access to LEVENTRPT.
Error Message Queue Name
The message queue name specifies the message queue and library where Authority Broker sends messages. Messages are sent to this queue when an unknown error causes Authority Broker to fail. Most installations specify QSYSOPR in Iibrary QSYS.
External Message Queue Name
The Authority Broker-supplied alert method EXTERNALMSGQ sends messages to this External message queue. Messages are sent to this message queue when it exists.
Possible values are:
- NONE: Signifies that there is no external message queue being used.
- message-queue-name The name of the external message queue. It must conform to IBM's object naming standards.
Default Switch Duration
The default number of minutes a system user is allowed to stay swapped to a switch user. This value can be overridden at the switch pair level.
Valid values are:
- minutes: The number of minutes [1 - 99999] that a switch is allowed to remain in effect. Specifying a number of minutes here results in *TIMED switches.
- *NOMAX The switch will not be timed and will remain in effect until released by the user or the job ends.
Enable FireCall
Enable FireCall controls the FireCall facility within Authority Broker.
Possible values are:
- No Select No to prevent usage of the FireCall facilities.
- Yes Select Yes to enable usage of the FireCall facilities.
About Authorization lists for FireCall: There are two authorization lists for FireCall (POWERABFO and POWERABFL):
1) POWERABFO
It is required that a FireCall Operator be added to the Authority Broker FireCall Operators authorization list (POWERABFO) in order to use the LFIRECALL and LFRCLLMNU commands. (The LFIRECALL command displays the FireCall Assignment screen and the LFRCLLMNU command displays the FireCall Menu.) The exception to this requirement is if the user has *ALLOBJ special authority.
A FireCall Operator must be on the POWERABFO authorization list in order to MAKE any FireCall Assignments via the following 'FireCall Access' option:
- 'Give user FireCall access' (option '1' on the FireCall Menu).
The exception to this is if the user has *ALLOBJ special authority.
2) POWERABFL
It is required that a FireCall Operator be added to the Authority Broker FireCall Review authorization list POWERABFL in order to use the LFRCLLMNU command.
A FireCall Operator must be on the POWERABFL authorization list in order to REVIEW any FireCall Assignments via the following two 'FireCall Log' options:
- 'FireCall log' (option '2' on the FireCall Menu).
- 'FireCall Log' (option '2' on the Authority Broker Reports Menu). The exception to this is if the user has *ALLOBJ special authority.
Timed switch command
Important Note for Users of FireCall and Switch Time-Outs
Authority Broker version 3 introduced the powerful capability to automatically revoke access to powerful user accounts after a predetermined time period. Authority Broker administrators can set limits on the duration of the profile switch and can even configure the action that is taken when the time expires. IBM has introduced job handling features (into V5R3 and later) that required a design change to the handling of timed switches. Powertech has implemented this in a way that will be transparent to most users. However, timed switch users, if you use F3 or F12 to back up beyond the timed switch command starting point, the switch will be released.
Any switch that has a time limit now goes to a command menu that is specified by the administrator in the product settings screen. For a new install, the default command menu for timed switches is ‘GO MENU(MAIN)’, the main IBM i command line menu. Please contact Powertech support if you have any questions about how this impacts your specific environment.
Switch end warning interval
Interval to notify switch time is coming to an end: The amount of time (in number of minutes) prior to the scheduled end of a Profile Switch when a user and the interested parties should be notified that the switch time is expiring.
Valid values are:
- Between 1 and 10
Switch end action for batch jobs
The action that is to be taken against a batch job when a Profile Switch's end time is reached.
Valid values are:
- *NONE - no action is to be taken
- *HLDJOB - places the job on hold
- *ENDJOB - ends the job controlled
- *NOTIFY - sends a break message to the user and sends out alerts to the parties interested in this profile switch.
- *ENDSWITCH - runs LRLSPRF against the switched job.
Switch end action for interactive jobs
The action that is to be taken against an interactive job when a Profile Switch's end time is reached.
Valid values are:
- *NONE - no action is to be taken
- *DSCJOB - disconnects the job
- *ENDJOB - ends the job controlled
- *NOTIFY - sends a break message to the user and sends out alerts to the parties interested in this profile switch.
- *ENDSWITCH - runs LRLSPRF
- *HLDJOB - places the job on hold
Switch History data retention period
Specify the number of days of switch history you would like to keep on-line. This does not affect the retention of the security audit journal data; rather, it controls the age of the on-line lookup data stored in Authority Broker. Possible values are:
- 10-99999 days Specify a number of whole days for which switch history will be available on-line.
- *NOMAX Switch history is kept on-line forever. This is the default.
Screen capture data retention period
Specify the number of days of screen captures you would like to keep on-line. This does not affect the retention of the security audit journal data; rather, it controls the age of the on-line lookup data stored in Authority Broker.
Possible values are:
- _10-99999 days Specify a number of whole dags for which screen captures will be available on-line.
- *NOMAX Screen captures are kept on-line forever. This is the default.
Command Keys
F3 (Exit): Ends the current task and returns to the display from which the task was started. If changes have not been accepted prior to F3 being pressed, they will be lost.
F4 (Lookup): Provides lookup capabilities when the cursor is on a promptable field.
F5 (Refresh): Restores the display to the values found in the database. Any changes will be lost.
F12 (Cancel): Returns to the previous menu or display. If changes have not been accepted prior to F12 being pressed they will be lost.