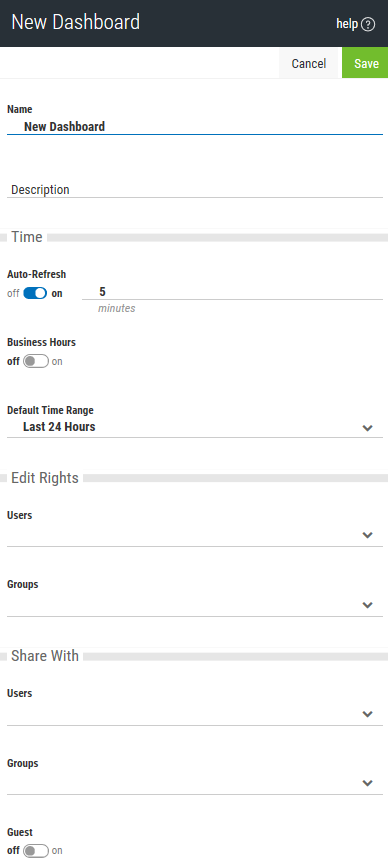
New/Edit Dashboard pane
How to Get There
Click  (Dashboards) in the Navigation Pane to open the Dashboard screen. To create a new Dashboard, click Add Dashboard. The Add Dashboard pane appears. Or, to edit one, click an existing Dashboard, toggle Edit Mode to On, then click Edit on the upper left of the Dashboard screen. The Edit Dashboard pane appears.
What it Does
Use this pane to configure Dashboard settings, which include values related to name, time, and accessibility.
Options
Name • Description
The name and description of the Dashboard.
Auto-Refresh; Off • On
Set Auto-Refresh to On and specify the interval (in minutes) you want Insite to refresh the data displayed in Widgets from the Data Source. Set Auto-Refresh to Off if you do not want to refresh data from the Data Source at a set interval.
Business Hours; Off • On • Start • End
Set Business Hours to On, and define a Start and End time, if you would like to define business hours. Set to Off to leave Business Hours undefined (the Dashboard operates on a 24x7 basis).
Default Time Range
Select the default time range for Widgets added to the Dashboard.
Edit Rights; Users • Groups
Use this section to select the users and groups who are authorized to edit this Dashboard.
Share With; Users • Groups
Use this section to select the users and groups who are authorized to view this Dashboard.
Guest
Toggle this to On to allow users who log on with the Guest profile to see this dashboard. The only thing Guest users can do is view dashboards marked as Guest. For more on the Guest profile, see Configuring Authentication Settings.
Cancel • Save
Click Cancel to dismiss the pane without making changes. Click Save to confirm changes and return to the Dashboard screen.